
1. Introduction
This project tries to help Groovy/Android developers to speed up project creation and configuration by using predefined templates.
1.1. License
Grooid templates are under Apache License 2.0
1.2. Github
You can find source code at https://github.com/grooida/grooid-templates
2. Installation
The first step is to get Lazybones installed on your system. The easiest way to achieve this goal is to install SDKMAN first:
$ curl -s "https://get.sdkman.io" | bash
$ source "$HOME/.sdkman/bin/sdkman-init.sh"
Install the latest version of Lazybones with the following command:
$ sdk install lazybonesNext, add the Android Lazybones templates repository to your Lazybones
configuration. Edit $USER_HOME/.lazybones/config.groovy and paste
the following content
bintrayRepositories = [
    "grooida/grooid-templates",
    "pledbrook/lazybones-templates"
]
3. Templates
These are the current available templates.
3.1. App
latest grooid-new-project template version is: 1.1.7
|
We’re now ready to create the project. You can list all available templates from the command line with:
$ lazybones list
Available templates in grooida/grooid-templates:

grooida/grooid-new-project
grooida/grooid-new-library
And then create a new project by executing:
$ lazybones create name-of-the-template [optional-template-version] name-of-the-project| If no version is used, then the latest is implied |
Lets see an example:
$ lazybones create grooid-new-project newandroidproject

Creating project from template grooid-new-project 1.1.7 in 'newandroidproject'
DEFAULT source code package ? [grooid.app]:
MIN version of SDK you want to target ? [19]:
MAX version of SDK you want to target ? [21]:
DEFAULT version for Android Build Tools ? [22.0.1]:
DEFAULT version for Android support v4 ? [21.0.0]:

What is newandroidproject
--------------------------------------

You've just created a basic Android-Groovy application. It provides a standard project structure and
a basic Gradle plugin. Now is up to you to add your source files and edit them with Android Studio
and have fun :)


Project created in newandroidproject!
Now you can import your project to Android Studio.
3.1.1. Import to AS
This section has been written using Android Studio
2.2.3. It’s always recommended to use the latest available AS.
|
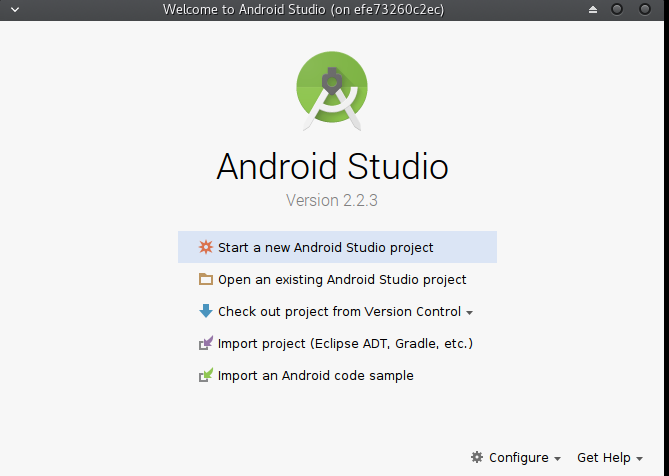
Open Android Studio and click Import project (Eclipse ADT, Gradle, etc.):
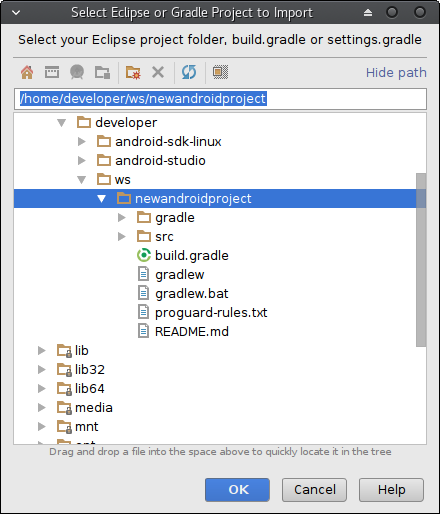
Then you should select the directory containing the Gradle project.
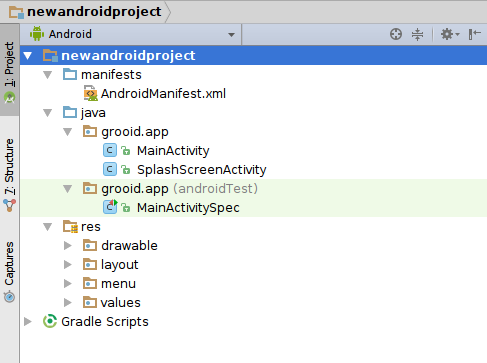
Because the project has an embeded Gradle wrapper, Android Studio will load that version in order to build the project. Once the project has been loaded your Android view should look like this:
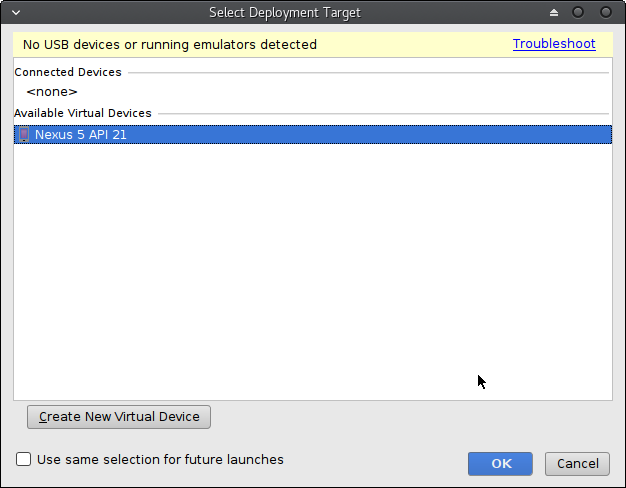
The project also is configured to be executed in an emulator. If you have already configured an emulator with the right SDK version, you can click on the play button found on the top in the tools bar.

Select the proper emulator image (It will depend on the configured SDK).
And finally you will see the exaple application running.
Now you have the base is all up to you. Happy coding :)
3.1.2. Libraries
The project you’ve just created has some useful dependencies in order not to start from scratch.
-
Swissknife(https://github.com/Arasthel/SwissKnife)
A multi-purpose library containing view injection and threading handling for Android using Groovy AST transformations, extensions and DSLs
-
Retrofit(http://square.github.io/retrofit/)
An easy REST client for Android and Java
-
Picasso(http://square.github.io/picasso/)
A powerful image downloading and caching library for Android
-
Android-Spock(https://github.com/pieces029/android-spock)
Use Spock (https://github.com/spockframework) tests in your Android app.
3.1.3. Emerger plugin
An Android/Groovy project can make use of more Groovy libraries as
well, that’s great, but the problem comes when using module
extensions. One limitation of an Android application building process
is that any app should beware of repeating file names within the same
directory hierarchy.
Because module extensions are all build with a specific file put in a specific directory, that eventually will make Android build process to complain.
The Emerger plugin is aimed for merging all module extension
descriptors into one to overcome the Android build process limitation.
| At the moment the Emerger plugin is in beta phase, so the more feedback the better at https://github.com/grooida/emerger |
3.2. Library
latest grooid-new-library template version is: 1.0.3
|
If you want to create an Android library then you should use the
create-new-library template:
$ lazybones create grooid-new-library newandroidproject

Creating project from template grooid-new-project 1.0.3 in 'newandroidproject'
DEFAULT source code package ? [grooid.app]:
MIN version of SDK you want to target ? [19]:
MAX version of SDK you want to target ? [21]:
DEFAULT version for Android Build Tools ? [22.0.1]:
DEFAULT version for Android support v4 ? [21.0.0]:
...
Then follow the same instructions than in previous chaper to import your project to Android Studio.